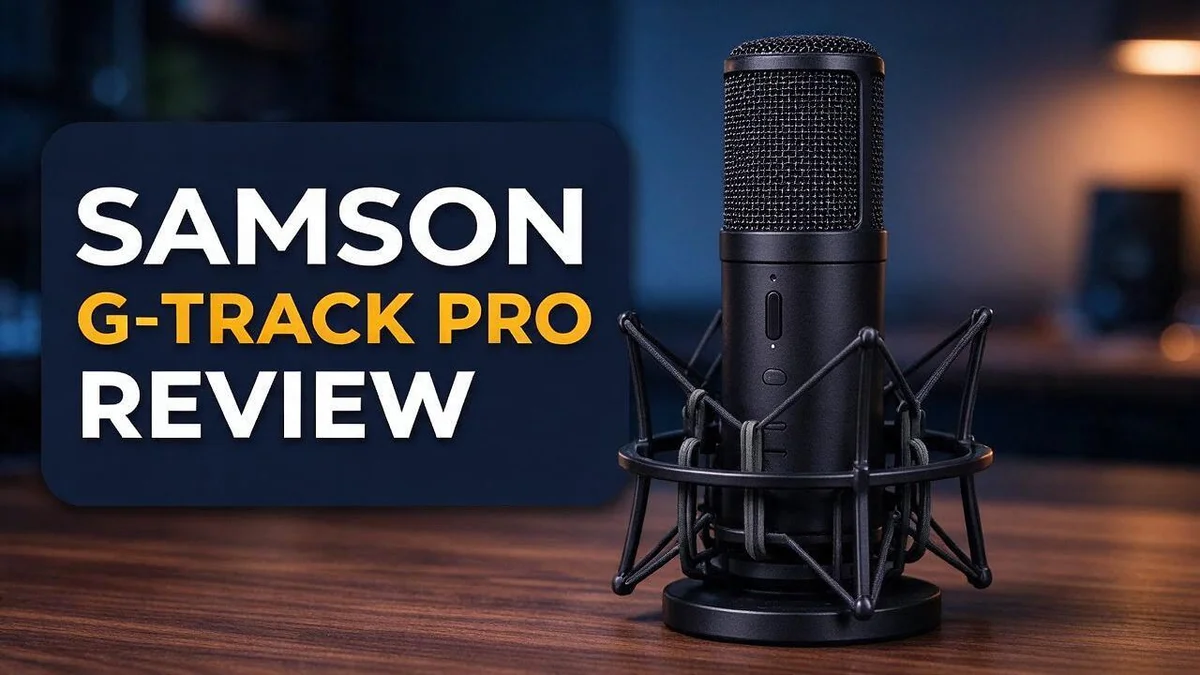
Samson G-Track Pro Review 2026: Skip or splurge?
Are you looking for a mic that does more than one job? The Samson G-Track Pro might be the answer you need. It combines a microphone, an instrument input, and a mixer in one compact unit.
Its dual 1 inch condenser capsules give you plenty of flexibility. You can pick from figure 8, cardioid, and a third pattern. That makes it easy to match the sound to your space.
Here is what makes it stand out. It records two independent audio channels at the same time. You can capture an acoustic guitar and an electric instrument on separate tracks. Then you can blend them later in your DAW.
Podcasters, streamers, and musicians all use it. Still, it has a few drawbacks worth knowing about. It connects by USB rather than XLR, and it feels quite heavy. Read on to see if this mic fits your setup.
In a Nutshell
Here is a quick look at what the Samson G-Track Pro offers beyond the basics.
- Three polar patterns let you pick how the mic hears. You can choose figure 8, cardioid, or a third pattern based on your setup.
- A built in quarter inch instrument input lets you plug in a guitar or bass right away. No extra box is needed for those sounds.
- Clear 24 bit and 96kHz audio comes from its built in converter. Your recordings keep plenty of detail for voices and instruments.
- Separate tracks for blending keep acoustic and electric sounds apart in your DAW. You can adjust each one later without starting over.
- A USB only connection means no XLR option. One user sees this as a limit, so check your current gear before you start.
- Solid weight is another thing to consider. One user says it weighs a ton, so plan for a sturdy stand and enough desk space.
Overall, it suits people who want one device for vocals and instruments. Just weigh the USB limit and the heavy build before you decide.
Polar Patterns and Dual Capsules

Last update on 2026-11-06 / Affiliate links / Images from Amazon Product Advertising API Some of the links on this website are affiliate links, which means that at no additional cost to you, I earn a commission if you click through and make a purchase. I only recommend products and services that I believe will add value to my readers. Thank you for your support!
Think of polar patterns as the ears of your microphone. They decide which sounds get picked up and which sounds get ignored. Picking the right pattern can shape every recording you make.
The figure 8 pattern listens from the front and the back. It rejects sound coming from both sides. This setting works well when two people sit face to face at a table.
The cardioid pattern focuses on the front only. Sound from behind the mic fades away. This helps block room echo and keyboard clicks from the sides.
Think of the dual capsules as two separate listeners in the same room. Each one hears the space from its own position. This gives you more control over how the final sound comes together.
Position matters as much as the pattern you choose. Move closer for a warm and full tone. Step back for a wider and airy sound. Small changes in distance can make a big difference.
Your room plays a big role too. A quiet bedroom and a noisy living room need different choices. Test each setting with a short clip before you record a full episode.
The third pattern adds one more option for special sessions. Run a quick test to hear how it responds to your voice or instrument. Then compare it with the other settings side by side.
Keep your voice aimed at the front of the mic. Speaking off to one side can make your sound thin or uneven. A steady position keeps your tone consistent from start to finish.
Headphones help you hear these differences clearly. Use closed back headphones so the sound from your speakers does not leak into the mic. This keeps your recordings clean and focused.
Practice makes these choices feel natural. Spend ten minutes swapping patterns and listening back. You will learn your favorite setting faster than you think.
Sound Quality and Conversion
Sound quality starts with the converter. It turns your voice into digital data. Good conversion keeps small details intact.
Think of it as the translator between your voice and your computer. If the translation is clean, your recording sounds natural. If it is rough, you lose subtle tones.
Headroom matters more than most beginners expect. Headroom is the space between your loudest sound and the point where audio distorts. Leave some room for sudden shouts or strong strums.
Set your input level before you hit record. Speak at your normal volume and watch the meter. Aim for peaks that sit comfortably below the top of the scale.
Sample rate affects how your files behave in editing. A higher rate can give you more room when you stretch or process audio. Your computer and software must handle that load, though.
Noise is the enemy of clean sound. Fans, traffic, and keyboard clicks can creep into the file. A quiet room and a close mic position reduce these sounds a lot.
The converter also shapes how your instruments sound. A guitar and a voice behave differently. Keep gain settings separate for each source so neither sounds harsh or thin.
Monitor with headphones while you record. Listening live helps you catch problems early. You can fix a hum or a clipped peak before it ruins the take.
Latency is another thing to check. Low delay lets you hear yourself in real time. Lag makes singing or playing feel off, so test it before a long session.
Recording a short test clip helps too. Play it back on different speakers and earbuds. Notice how your voice and instruments sit together in the mix.
Overall, the conversion suits clear voice work and layered instrument tracks. Trust your ears and compare with recordings you love. Small adjustments add up to a polished sound.
Instrument Input and Dual-Track Mixing
Many players record a clean signal first and add amp tones later in software. This approach keeps your options open. You can try many sounds without playing the part again.
Each source lands on its own track, so changes stay simple. You might boost a bass line or soften a rhythm guitar without touching your voice.
Balance comes first. Play a short section and adjust each track until both sit well together. Do this before you add any effects.
Try recording the instrument and the mic at the same time. Count in, play a verse, and listen back. You learn quickly how the pieces fit together.
Name your tracks clearly. Labels like Vocal, Acoustic, and Bass DI save time later. Your future self will thank you for that habit.
Keep the raw takes safe. Save an untouched copy of each track before editing. If a mix goes wrong, you can start over without playing everything again.
Separate tracks also help with teamwork. You can send a bandmate only the guitar track or the vocal track for feedback. They hear exactly what you hear.
Timing matters too. Check that both tracks start at the same point. A small offset can make a strummed chord sound loose and messy.
Give each part its own space. Pan the guitar slightly left and keep the vocal near center. This layout helps listeners separate the parts easily.
Many beginners mix too early. They shape sounds before they capture a solid performance. Record everything first, then refine the sound later.
Fix small mistakes right away. If a note clips or a line sounds off, stop and try again. Quick fixes keep your session fresh and focused.
Practice this workflow a few times. Each session will feel smoother than the last. Soon, switching between tracks will feel completely natural, and your ears will grow sharper with every take.
Top 3 Alternatives
Looking for other options? These three microphones work well for podcasts, streaming, and home recording.
Audio-Technica AT2020USB+

Last update on 2026-11-06 / Affiliate links / Images from Amazon Product Advertising API Some of the links on this website are affiliate links, which means that at no additional cost to you, I earn a commission if you click through and make a purchase. I only recommend products and services that I believe will add value to my readers. Thank you for your support!
This microphone delivers clear and detailed sound.
It uses a cardioid pattern, which blocks much of the room noise.
It has a built-in headphone jack with zero-latency monitoring. You hear yourself in real time.
It also supports 24-bit and 96kHz recording. The mic works well for voiceovers, music, and video calls.
Blue Yeti


Last update on 2026-09-19 / Affiliate links / Images from Amazon Product Advertising API Some of the links on this website are affiliate links, which means that at no additional cost to you, I earn a commission if you click through and make a purchase. I only recommend products and services that I believe will add value to my readers. Thank you for your support!
The Blue Yeti is a favorite for beginners.
It offers four polar patterns for solo, group, or stereo recording.
A mute button and gain control sit right on the mic.
It plugs straight into your computer over USB. Setup takes only a few minutes. Many creators pick it for its easy setup and clear audio.
Rode NT-USB Mini

Last update on 2026-11-06 / Affiliate links / Images from Amazon Product Advertising API Some of the links on this website are affiliate links, which means that at no additional cost to you, I earn a commission if you click through and make a purchase. I only recommend products and services that I believe will add value to my readers. Thank you for your support!
This compact mic fits easily on a small desk or in a travel bag.
It delivers rich and full vocals in a small body.
The built-in headphone output has its own volume knob.
Smart Volume helps prevent harsh peaks and clipping. A pop filter comes in the box, which reduces plosive sounds. It suits podcasters who record on the move.
Each option offers clear audio and simple setup. Pick the one that fits your space and recording style.
Build, Weight, and USB Connection
The first thing you notice is the weight. One reviewer says it weighs a ton, and that tells you a lot about the build. A heavy body stays planted on your desk.
Solid weight also helps when you move around. You can nudge your desk or lean in without the unit wobbling. That stability keeps your setup calm during long sessions.
Your setup depends on how the unit sits. Place it on a stable surface first. Then angle it toward your mouth or your instrument so the sound stays consistent.
The USB connection is the main link to your computer. You plug in one cable and the unit appears as a device. This keeps your desk tidy because you skip extra boxes and cables.
USB keeps things simple for beginners. You do not need a separate audio interface to start recording. Setup feels quick, which helps you start sooner.
The tradeoff is clear. USB rather than XLR may limit you later. One user sees this as a limitation, so think about your plans first.
Cable placement matters too. Run the USB cable behind the desk or along a cable tray. A loose cable can tug the unit and cause small noises. Leave a little slack near the computer end.
Check the cable length before you set up. Your computer should sit close enough for the cable to reach without strain.
When you pick it up, you feel the solid frame right away. That first impression builds trust in your gear.
If you use a boom arm, check that the arm can handle the load. A heavy unit needs a sturdy clamp.
Treat the unit with care too. Dust can settle on the grille, so wipe it gently with a soft cloth. Keep drinks and spills far away from the body.
Best Use Cases: Podcasting, Streaming, and Music
Podcasting is a natural fit for this microphone. Solo hosts can select the cardioid pattern to focus on their voice. Sound from the back gets less pickup, which helps in shared rooms.
Interviews call for a different approach. The figure eight pattern picks up sound from both the front and back. Two speakers can sit facing each other and share one microphone.
Podcasters who record in groups should test the third pattern too. It offers another option for panel discussions. Try each setting with real speech before you record an episode.
Streaming benefits from a focused voice. Streamers often switch between talking and playing a game or video. A cardioid pattern keeps attention on the voice during fast sessions. Viewers hear you clearly without strain.
Long streams can run for hours. Keep your mic position steady so your voice stays even from start to finish.
Live content also rewards quick decisions. Streamers can keep voice and a second source on separate channels. That split gives you more control when you edit highlight clips later.
Musicians can use the mic for vocals and acoustic instruments. Solo performers and songwriters can capture a voice and acoustic guitar in one take. The cardioid pattern helps isolate the singer from the room.
Band rehearsals benefit too. Two players can share a space while the mic captures a vocal line and a nearby instrument.
Home studios also benefit from fast sketches. Capture a melody idea before it fades. A quick recording saves time later.
Choose the pattern that matches your project. Each use case asks for different pickup. Record a short test with your real voice or instrument before you commit to a full session. The right choice saves rework later.
Pros and Cons
Pros
– The mic, instrument input, and mixer sit in one unit.
– Two sources can record at the same time on separate tracks.
– The 24-bit and 96kHz converter captures clear, detailed sound.
– A 1/4 inch input lets you plug in guitars or basses directly.
– Dual capsules offer three polar pattern choices.
Cons
– No XLR connection limits use with professional studio gear.
– No formal review with ratings exists yet.
– The third polar pattern is not clearly named in the specs.
Who Should Buy It
This unit fits creators who want fewer parts on their desk. Many home studios grow messy fast. One compact device can replace a separate microphone, instrument input, and small mixer.
Guitar teachers and tutorial makers may find it useful too. They can record a playing demo through the instrument input while they explain each step on the mic. Each source lands on its own track, so editing stays simple.
Songwriters who work alone in a bedroom studio also gain value here. They can capture a rough idea without setting up extra gear. Sketching a song should feel fast, not frustrating.
Beginners who want to learn recording basics can benefit as well. Two independent channels show how levels, tracks, and blending work in a DAW. Learning by doing often sticks better than reading theory.
Hobbyists who record a few times a month also fit this profile. They do not need a full studio setup for every session. A single unit stays ready on the desk.
People with limited space also benefit from this design. One unit takes less room than a stack of separate devices. Shared households and small apartments often need this kind of efficiency.
Duos who sing and play together gain flexibility too. One singer can sit at the mic while the guitarist plugs in directly. Each performer stays on a separate track for clean mixing later.
Some buyers should look elsewhere, though. Engineers who rely on XLR studio gear will hit a wall. Their existing cables and preamps will not plug into this unit directly.
Careful shoppers should also read recent feedback first. No formal review with ratings exists yet. Hands on testing from real users offers the clearest picture for now.
Think about your recording habits before you commit.
Final Verdict
The G-Track Pro earns a strong spot on the shortlist for creators who want fewer parts. It brings a microphone, instrument input, and mixer into one unit. Still, the final choice depends on your daily routine.
Think of this device as a trade. You give up some flexibility from separate gear. In return, you get a cleaner desk and a simpler setup. For many people, that trade makes sense.
Over time, your plans matter too. Ask yourself whether you will need an XLR connection within a year. If you plan to build a full studio, this unit may serve as a starting point rather than a final purchase.
Since no formal ratings exist, your own test matters most. Record a short voice sample first. Then record a guitar or second source. Listen on headphones and on speakers.
The separate tracks deserve special attention. Keeping sources apart gives you room to fix problems later. You can adjust balance, tone, or timing without redoing the whole session. That freedom can save hours of work.
Pattern choice also affects results. Test each setting in the same room you normally use. Background noise, echo, and distance from the mic all change the sound. A small change in position often matters more than a new setting.
A simple test can guide you. Write down the three recordings you make most often. If the G-Track Pro handles all three well, it likely fits your needs. If one task falls outside its strengths, look for another option. Keep notes after each session, too. Patterns in your results show what works best in your space.
Our overall take is simple. The G-Track Pro suits people who value convenience and want to capture two sources at once. It may frustrate anyone who expects a traditional studio chain. Match the tool to your actual habits, not your hopes for future projects.
Frequently Asked Questions
Does the G Track Pro use an XLR connection?
No, it connects only through USB. If your setup depends on XLR gear, plan for that limit before you buy. Most home creators will find USB simple to use.
Can it record two sources at the same time?
Yes, it records two independent channels at once. You can place a voice on one track and an instrument on another. Then you can blend both sources later in your DAW.
Which polar pattern should I choose?
Start with a short test recording in each pattern. Speak or play the same phrase, then listen back. Your own ears will show which setting sounds best for your room.
Has anyone published a formal review with ratings?
Not yet. The older Samson G Track Interface review likely covers the original model, not the Pro. Read recent user feedback to learn how the unit performs for others.
Who gets the most value from this unit?
Solo creators with limited space often benefit most. Songwriters, guitar teachers, and beginners can also use it to record voice and instruments without buying extra parts. Duos who sing and play together gain flexibility too.

Hello everyone my name is Alenya and i am a gadget discovering Enthusiast 🐻🐻